
The Whirly Top! -a free crochet pattern & Scheepjes Whirl Review

I know… it's been a while since I've posted any patterns. Life's been busy. Between my full time job and family life at home, I've been struggling to keep up with my blogging and pattern writing. I've never stopped crocheting, and have a notebook full of patterns and notes over the past year that I'd love to be able to bring out of hiding. From hats (lots of hats!) to clothing patterns, today… I am bringing you a fun twist (pun intended) on a cute crochet top!
A few weeks ago, I was invited by Yarn Canada to review a yarn called “Whirl” by Scheepjes. Immediately, I had to check this out online to see if it was a good fit for me. Scheepjes Whirl is a fingering weight yarn cake that is available in 15 beautiful color variations. I was impressed! I chose “Watermelon Hell Raiser” not just because it has a cool name, but it looks cool too!

So I accepted the invite to review. I've been on this crochet home décor kick lately and have been making plant holders, baskets, etc, and thought that I was going to use this yarn for a lacy plant holder pattern I'd been writing. Then the yarn arrived… There was no way I could use this beauty of a yarn cake on something small like a plant holder… this yarn needs to go into something epic!
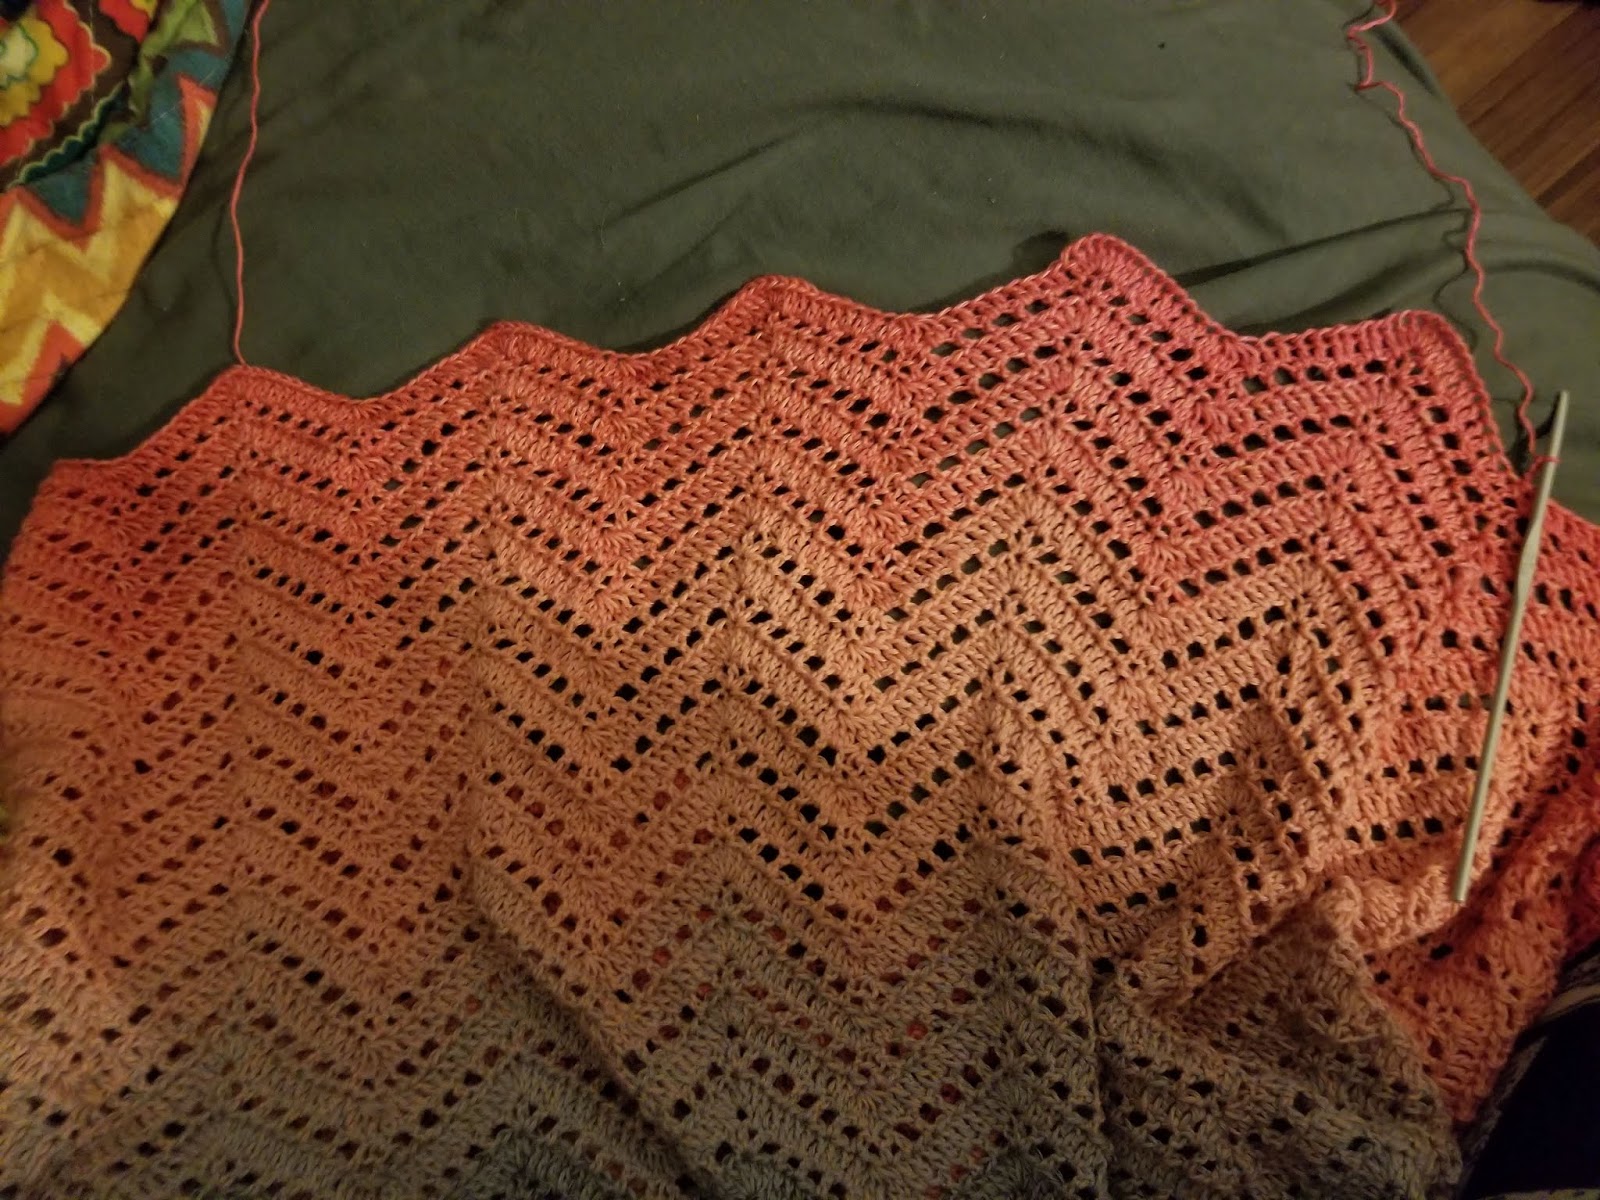
The Whirl yarn cake, as I already mentioned, is a fingering weight yarn and there's a lot of it! One cake would easily work into a large shawl. The color changes in this yarn are very long! It is not variegated, but works from one color, changing gradually as an ombre effect into another color; in my case going from black to dark pink. So I needed a big project, like a shawl, but although I love making shawls, I just never wear them; and this is a project that I want to keep for myself.
I'd been toying with this crochet dress idea in my head for a while that features a twisted bustline and an empire waist. I was just undecided on what yarn I was going to use. So now is better than ever, why not use this yarn for this project?! I knew I probably wouldn't get an entire dress out of this project, but a really cute top (and I can always add onto it later). One more Whirl cake would make a dress!
I will go onto the pattern here in a moment, but first, I want to tell you about this yarn!

Scheepjes Whirl is a very fun yarn to work with! It features a generous twist of color fibres that gradually change as you go. It is perfect for crochet or knit garments as it drapes beautifully and feels light and airy, which I especially love! I chose a color called “Watermelon Hell Raiser”. I was torn between this color and one called “Dandelion Muchies”, although they are all absolutely stunning color combinations!
The yarn itself glides along nicely and works up quickly. I found myself working like a madwoman, because it's exciting to get to the next color change! I started my project with the outside of the cake so that black would be on the top of my garment, although you could start from the center with the dark pink instead if you wanted. So starting with black, the color changes turn to variants of black/gray to gray,... to gray/pale pink,... to pale pink,... to pale/pink/dark pink,... all of the way to dark pink. Things started getting really exciting when I started seeing the gray to pale pink!
Would I use this yarn again? YES, absolutely! It's pricey but highly worth it! (I am very appreciative that I got to try this for free!) No other yarns I've ever used compare to this cool ombre effect in a fingering weight yarn. The twist of color fibres make the yarn! And not to mention, this is a big ball… there's a lot of yarn to complete most projects. I doubt you'd run out.
I rate Scheepjes Whirl a 5 out of 5 Stars! I can't wait to try another color combo because it's so fun to work with!
All of that being said, here's more about my pattern….
 I wrote this pattern to fit me. I would consider myself a size large. So all specs in this pattern are to accommodate this size. You can easily adjust the size by decreasing the vertical rows at the top. Just keep in mind that when you remove rows from one side, you need to also remove the same amount from the other side. If you're going to do this, read through the pattern first and look at the photos so that it all makes sense. Also for other sizing, you may run into trouble when you get to the chevron lace, as you need a certain stitch count to make it work. Just make sure it is divisible by 16. You can add a stitch here and there when you get to the part under the bust to make it work. In my pattern, I have 224 stitches under the bust, divided by 16 is 14 repeats
(chevrons), so a smaller size at 13 chevrons, you would need to have 208 stitches, and a larger size would require 240 stitches (15 chevrons). Someday I may go through and size this up, but as for now, I am just excited to show you my project!
--------------------------------------------------------------------------------------
THE PATTERN!
Whirly Top - a crochet pattern by Farrah Hodgson
Materials Used:
YARN: 1 ball Scheepjes Whirl - a cake yarn with a generous twist making it easy to work with and knit up fast. A mix of cotton and acrylic and a fingering weight this yarn has a beautiful drape and will create garments that are lightweight and breathable. Get value with the big 1000 meter balls that beautifully self-stripe as you knit. Create a wide range of accessories and garments - one ball makes a large shawl or wrap! Machine washable.
Weight: 1-Super Fine (Fingering) | Ball Weight: 7.9 oz. / 215 g | Ball Length: 1094 yard / 1000 Content: 60% Cotton, 40% Acrylic
CROCHET HOOKS: 3.25mm/D3 and 3.5mm/E4
OTHER: Yarn Needle to weave in ends
SIZE: Large
MEASUREMENTS: 32 inches around torso under bust line; flares to 48
inches around at bottom hem (unstretched)
--------------------------------------------------------------------------------------
TOP (Part 1) - the top consists of simple vertical double crochet stitches worked back and forth in short rows. The top is assembled in 2 pieces to accommodate the twist in the bust. You will be crocheting the 2^nd part of the bust directly to the first piece (preferred) or you can sew it on afterward. I prefer to avoid as much sewing as possible!
Ch14
Row 1: Dc in 4th chain from hook (this counts as 2dc), dc in the next 10 chains.
Rows 2-26: Ch3, turn (counts as 1dc); -do not work in the turn st!- dc in next 11 sts. (=12dc)
Note: From here on out, the ch3 at the beginning of each row counts as 1dc and DO NOT work in the same turning st.
Row 27: Ch3, turn; dc in next 2 sts, 2dc in next st, (dc in next 3 sts, 2dc in next st) twice. (=15dc)
Row 28: Ch3, turn; dc in next 14 sts. (=15dc)
Row 29: Ch3, turn; dc in next 3 sts, 2dc in next st, (dc in next 4 sts, 2dc in next st) twice. (=18dc)
Row 30: Ch3, turn, dc in next 17 sts. (=18dc)
Row 31: Ch3, turn; dc in next 4 sts, 2 dc in next st, (dc in next 5 sts, 2dc in next st) twice. (=21dc)
Row 32: Ch3, turn; dc in next 20 sts. (=21dc)
Row 33: Ch3, turn, dc in next 5 sts, 2dc in next st, (dc in next 6 sts, 2dc in next st) twice. (=24dc)
Rows 34-71: Ch3, turn; dc in next 23 sts. (=24dc)
Row 72: Ch3, turn; dc in next 5 sts, dc2tog, (dc in next 6 sts, dc2tog) twice. (=21dc)
Row 73: Ch3, turn; dc in next 20 sts. (=21dc)
Row 74: Ch3, turn; dc in next 4 sts, dc2tog, (dc in next 5 sts, dc2tog) twice. (=18dc)
Row 75: Ch3, turn; dc in next 17 sts. (=18dc)
Row 76: Ch3, turn; dc in next 3 sts, dc2tog, (dc in next 4 sts, dc2tog) twice. (=15dc)
Row 77: Ch3, turn; dc in next 14 sts. (=15dc)
Row 78: Ch3, turn; dc in next 2 sts, dc2tog, (dc in next 3 sts, dc2tog) twice. (=12dc)
Rows 79-104: Ch3, turn; dc in next 11 sts. (=12dc)
-Fasten off!

You now have something weird and long that looks like this!
TOP (Part 2) - You have two options for this part:
Option 1 - Sew it on afterward; Make another piece following the exact directions from part 1. (see photos for placement)
Option 2 – Attach as you go (as I did);
---Attach to Part 1- Row 1 with a slip stitch and chain 14.

Rows 2-46: Following the same directions from Part 1, except joining at the end/beginning of each row from Part 1.
How to join:
For the end of rows that join to Part 1 (all odd numbered rows); join by working the second yarn over of the last dc through the top of the dc from the same row in Part 1.
For the beginning of rows that join to Part 1 (all even numbered rows); join by working the 3rd ch from the beginning ch3 through the top of the dc from the same row in Part 1.


Crossover & Join
-Pull the unjoined part from Part 2 down across the 1st part (see photo)
-Skip over 12 Rows from part 1 and join with a slip stitch to the bottom of stitch of the next row.

Row 59: Ch2, sl st in the top of the same dc from part 1, dc in next 11 sts.
Rows 60-104: Continue to follow same directions as Part 1, except joining at the end/beginning of each row.
DO NOT FASTEN OFF!

EDGING -You are now working along the edges ( the row ends) of the entire piece.
(Bottom) Ch1, work 2sc in each row end (the dc or ch3 space from the beginning/ends of each short row), making sure to follow the edge, switching to the opposite part in the center. You should have 108sc. Fasten off.
(Top) Repeat instructions for opposite side.
(Optional), Ch1, turn, work and rsc (Reverse Single Crochet aka Crab
Stitch) in each sc.

BACK SEAM -Turn work wrong side facing, and sl st both short edges together to join. (12 sts)

-Do NOT fasten off, but turn work Right Side out.

BOTTOM -Now we will be preparing the next handful of rows to flare and create
an open lacy chevron effect.
Row 1: Ch1, turn; work 216 sc around piece, sl st in ist sc to join.
Row 2: Ch1, turn; sc in next 54sts, ch10 (optional tie loop), sc in next 108sts, ch10 (loop), sc in next 54 sts, sl st in 1st sc to join.
Row 3: Ch1, turn; (sc in next 26sc, 2sc in next st) 8 times, sl st in 1st sc to join. (=224sts)
Row 4: Ch1, turn; (sc in next 3 sts, hdc in next 2 sts, dc in next 2 sts, 3dc in next st, dc in next 2 sts, hdc in next 2 sts, sc in next 4 sts) 14 times, sl st in 1^st sc to join. (=252sts)

Row 5: Ch1, turn; (sc in next 5 sts, hdc in next 4 sts, 5dc in next st, hdc in next 4 sts, sc in next 4 sts) 14 times, sl st in 1st sc to join. (=308sts)
Row 6: Ch3, turn; -skip joining st- dc2tog, (dc in next 8 sts, 5dc in next st, dc in next 8 sts, dc5tog), 13 times, dc in next 8 sts, 5dc in next st, dc in next 8 sts, end with dc2tog, sl st in 1st st to join.
Row 7: Ch3, turn; -skip joining st and next st- dc in next st, ch1 [(skip next st, dc in next st, ch1) 4 times, skip next st, (dc-ch1, dc-ch1,dc-ch1) in next st -this is in the center st of the 5dc-, (skip
next st, dc in next st, ch1) 4 times, (dc3tog with 1 skipped st between each dc, ch1)] repeat sequence in [..] 13 times, (skip next st, dc in next st, ch1) 4 times, skip next st, (dc-ch1, dc-ch1, dc-ch1) in next st, (skip next st, dc in next st, ch1) 4 times, end with skip 1 st, dc2tog with the 1st dc to join, leaving 1 skipped st between.
See diagram.

I hope this helps!
Row 8: Ch3, turn; skip join st, dc2tog, (dc in next 9 sts, 5dc in next st, dc in next 9 sts, dc5tog) 13 times, dc in next 9 sts, 5dc in next st, dc in next 9 sts, end with a dc2tog with the 1^st dc to join.

Row 9: Repeat Row 7
Row 10: Repeat Row 8
Switch to Hook Size 3.5mm/E4
Repeat Rows 7 and 8 until you are happy with the length.
Last Row: Sc in each st around.
Fasten off and weave in ends.

Almost done!

This is how much yarn I had left!
STRAPS -you are attaching the yarn to the front top of the garment and working back and forth in short rows to meet the back of the garment.
NOTE: I used a different yarn here. I knew I wouldn't have enough of the Whirl yarn left, so I grabbed a ball of stash with a sort of matching color. So the amount of rows in the straps depend on which yarn you use!
Lay garment flat with back facing. Measure in 4 inches from center and attach yarn with a sl st to the top of garment.

Row 1: Ch1, sc in next 4 sts to the left (or however wide you'd like your straps)
Rows 2-??(stop when your strap measures 14 inches un-stretched): Ch1, turn; sc in next 4 sts.

Last Row: Measure in 4 inches from the center back and work through 4 sts along the top, fasten off.
Sew in ends.
Repeat for second strap.
TIE CORD (Optional) - Note: I tried this, but decided I liked it better without.
Simply make a chain as long as you need. Turn and work an sc in each ch. Fasten off, Sew in ends.
Pull the tie through the tie loops on the sides of the top under the bust.
DONE!!


Thanks for checking out my pattern and review! I hope you enjoyed it as much as I did!
-Farrah


Comments
Post a Comment