
XvX Visor -free crochet pattern-
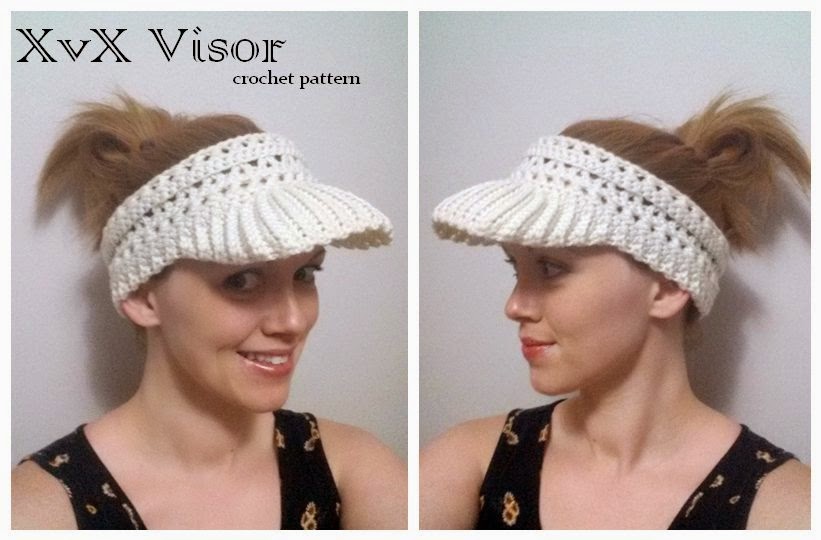
I've been using this brimmed edge pattern for several years on regular winter hats, but I wanted something a little more airy and fresh for spring. How about just a visor? I envisioned something light colored and lacy, and when I got down to writing, it came out exactly as planned! Of course, you can make this in any color you want, or even multi-colored. I also want to try this out in cotton yarn!
The pattern begins from the top of the headband and works it's way down in rows. It is worked in one piece, back and forth; because in the end, you will attach two 30 mm buttons to close it up. You don't need to make any buttons holes, because Rows 2 and 6 (X-Stitich Rows) have enough gap, that the buttons will fit through, therefore, allowing you to adjust the size of your headband.
From the last row of the headband, you continue on with the ribbed visor. You work back in forth in short rows along the headband edge, increasing stitches and rows towards the center, to give the visor brim some flex and curve.
When you're done, just stretch the visor out to shape it! The visor will hold in place on it's own! (as long as you use a heavier yarn, soft yarns will not work)
Designed By: Farrah Hodgson/Firene Designs
Skill Level: Intermediate
Materials:
- Red Heart Super Saver, Color Aran, Worsted (4) (I used less than 1/4 of the ball)
- Hook size 4.5mm (G)
- 2 buttons (20-30mm)
- Yarn Needle
Size: Adult head, button adjustable
Abbreviations Used: Ch=Chain, Sc=Single Crochet, Dc=Double Crochet, Sl st=Slip Stitch, 2sctog=Single crochet next 2 stitches together (decrease)
Special Stitches Used:
- X-Stitch= Skip next stitch, dc in next stitch; dc in the skipped stitch. (this creates a cross over or X)
- V-Stitch= *Dc, ch1, dc** all in same stitch
Begin with the construction of the HEADBAND
Ch 87
Row 1: Sc in 2nd ch from hook, sc in next 85 chs. (86 sc)
Row 2: Ch3, turn; (working through back loops only) *X-Stitch over next 2 sts**, repeat across until end of row. (43 sets of X-Stitch)
Row 3: Ch1, turn; (working through front loops only) sc in each st across. (86 sc)
Row 4: Ch3, turn; (working through back loops only) dc in 1st st, skip next st; V-Stitch in next st, *skip next 2 sts, V-stitch in next st** across until last 2 sts; skip next st, dc in last st. (28 V-stitches)
Row 5: Ch1, turn; (working through both loops) sc in each st across. (86 sc)
Row 6: Ch3, turn; (working through back loops only) *X-stitch over next 2 sts**, repeat across until end of row. (43 sets of X-stitch)
Row 7: Ch1, turn; (working through front loops only) sc in each st across. (86 sc)
Do not fasten off.
Continue on in short rows to shape the PEAK
You will be working along the "base sts" (along last 86 sc of Row 7)
Row 1: Ch3, turn; sc in 2nd ch from hook; sc in next ch.
-working in backloops for remainder of short rows.
Row 2: Sl st in next 2 base sts, turn; skip over the 2 sl sts, sc in next 2 sts.
Row 3: Ch1, turn; sc in next 2 sts.
Row 4: Sl st in next 2 base sts, turn; skip over the 2 sl sts, sc in next 2 sts.
Rows 5/6 up to 27/28: Repeat Rows 3 and 4
**Tip: You may count over 28 stitches from the beginning and place a stitch marker
Row 29: Ch1, turn; 2sc in next st, sc in next st. (3sc)
Row 30: Sl st in next 2 base sts, turn; skip over the 2 sl sts, sc in next 2 sts, 2sc in next st. (4sc)
Row 31: Ch1, turn; 2sc in next st, sc in next 3 sts. (5sc)
Row 32: Sl st in next 2 base sts, turn; skip over the 2 sl sts, sc in next 4 sts, 2sc in next st. (6sc)
Row 33: Ch1, turn; 2sc in next st, sc in next 5 sts. (7sc)
Row 34: Sl st in next 2 base sts, turn; skip over the 2 sl sts, sc in next 6 sts, 2sc in next st. (8sc)
Row 35: Ch1, turn; 2sc in next st, sc in next 7 sts. (9sc)
Row 36: Sl st in next 2 base sts, turn; skip over the 2 sl sts, sc in next 8 sts, 2sc in next st. (10sc)
Row 37: Ch1, turn; sc in next 10 sts.
Row 38: Sl st in next 2 base sts, turn; skip over the 2 sl sts, sc in next 9 sts, 2sc in next st. (11sc)
Row 39: Ch1, turn; sc in next 11 sts.
Row 40: Sl st in the next 1 base st, turn; skip over the sl st, sc in next 10 sts, 2sc in next st. (12sc)
Row 41: Ch1, turn; sc in next 12 sts.
Row 42: Sl st in the next 1 base st, turn; skip over the sl st, sc in next 12 sts.
Rows 43/44 up to 55/56: Repeat Rows 41 and 42
Row 57: Ch1, turn; 2sctog, sc in next 10 sts.
Row 58: Sl st in the next 1 base st, turn; skip over the sl st, sc in next 11 sts.
Row 59: Ch1, turn; 2sctog, sc in next 9 sts. (10sts)
Row 60: Sl st in next 2 base sts, turn; skip over the 2 sl sts. sc in next 8 sts, sc2tog. (9sts)
Row 61: Ch1, turn; 2sctog, sc in next 7 sts. (8sts)
Row 62: Sl st in next 2 base sts, turn; skip over the 2 sl sts. sc in next 6 sts, sc2tog. (7sts)
Row 63: Ch1, turn; 2sctog, sc in next 5 sts. (6sts)
Row 64: Sl st in next 2 base sts, turn; skip over the 2 sl sts. sc in next 4 sts, sc2tog. (5sts)
Row 65: Ch1, turn; 2sctog, sc in next 3 sts. (4sts)
Row 66: Sl st in next 2 base sts, turn; skip over the 2 sl sts. sc in next 2 sts, sc2tog. (3sts)
Row 67: Ch1, turn; 2sctog, sc in next st. (2sts)
Row 68: Sl st in next 2 base sts, turn; skip over the 2 sl sts. sc in next 2 sts. (2sc)
Row 69: Ch1, turn; sc in next 2 sts.
Row 70: Sl st in next 2 base sts, turn; skip over the 2 sl sts, sc in next 2 sts.
Rows 71/72 up to 95/96 (end): Repeat Rows 69 and 70.
Fasten off.
Sew in ends.
Sew 2 buttons on back (either side) matching up to to Headband Rows 2 and 6

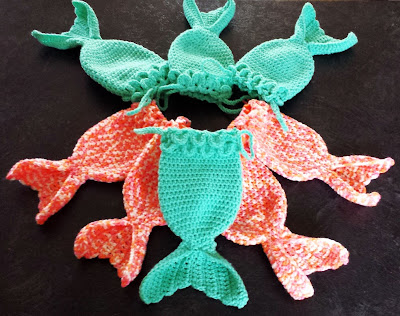
I made another one...


I love this pattern! I am so going to make one today! Thanks for sharing it!
ReplyDelete