
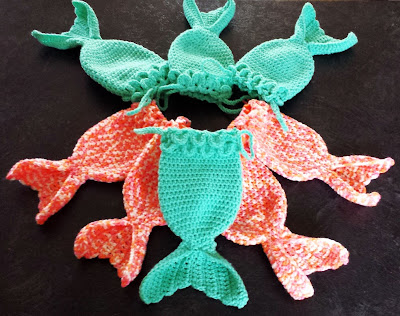
Learning Cables Cuff (Tutorial) -free crochet pattern-

Cables give an elegant twist and texture to garments. They look nice, and I've seen them used in crochet garments and accessories several times. But, I used to be afraid of them, very afraid! I avoided cabled patterns because it looked difficult. "Difficult" usually never stopped me before, but this just looked like a lot of work, directions, post stitches, skipping stitches, adding/subtracting, etc. Days, months, years went by...
...then I sat down one day and decided to attack this "cable phobia" and put it finally to rest. And I was surprised! It's actually not so hard. Like learning anything, it may be a bit tricky at first, but with patience and practice, you will be a cable pro in no time.
There's really no "set" rules with crocheting cables. It depends on your yarn, your hook, and the size of and what exactly you are making. I decided to write this tutorial to give you an easy start on understanding the crochet cable stitch. I've added some notes along the way on how you can make your own changes; you can avoid those until you've mastered my mini tutorial, or if you want to be a dare-devil, you can go ahead and make it your own way:)
____________________________________________________
Skill Level: Intermediate - Advanced (you should have a knowledge of the basic crochet stitches)
Materials Used:
- I used a stashed Worsted Weight (Medium 4) Yarn by Red Heart -Comfort.
- Hook Size 3.25mm (I used a smaller hook to make my project tighter)
(you can use any yarn, with any hook to match)
Size: Custom
Stitches Used: Ch=chain; Sc=Single Crochet; Dc=Double Crochet; Fpdc=Front Post Double Crochet; Bpdc=Back Post Double Crochet; Fpdtr=Front Post Double Treble Crochet; Sl st=Slip Stitch
**Fpdtr= Yarn over 3 times, insert hook in next st, yo, pull yarn through st, (yo, pull through 2 loops on hook) 4 times.
_____________________________________________________
Row 1: Ch 19; dc in the 4th ch from hook, dc in each of the next 15 chs.

Row 2: Ch 3 (counts as 1 dc), turn; fpdc over next dc, dc in each of the next 3 dc, fpdc over each of the next 3dc, dc in next dc, fpdc over each of the next 3dc, dc in each of the next 3dc, fpdc over next dc, dc in last st.

**Custom Note:
- Notice the two sets of "dc x 3" on each side; this is how much space is on each side of the cable, you can decrease or increase this amount.
- Notice the two sets of "fpdc x 3" on each side of the center; this is the width of your cables, you can decrease or increase this amount.
- Notice the "dc" in the very center between the two cables; this is a small space separating the cables. You can omit this; or you can add another stitch. You don't want to go too wide, so I would suggest not go any higher than two stitches.
- All of the above reflects your starting chain, so will have to adjust accordingly. See note for custom starting chain at end of pattern.
Row 3: Ch 3 (counts as 1 dc), turn; bpdc over next st, dc in each of the next 3 dc, bpdc over each of the next 3sts, dc in next dc, bpdc over each of the next 3sts, dc in each of the next 3dc, bpdc over next st, dc in last st.

Row 4 (CABLE STITCH): Ch 3, (counts as 1 dc) turn; fpdc over next st, dc in each of the next 3 dc; (skip over next 3 post sts and 1dc) fpdtr over each of the next 3 sts, ...


...(working behind the 3 fpdtr sts just made) dc in skipped dc, ...

**Custom Note: if you did not add a separating stitch(es), omit this step.
...(working in first 3 skipped sts) fpdtr over each of the next 3 sts, dc in each of the next 3 dc, fpdc over post of next st, dc in last st.

**Custom Note: I used a fp"dtr" for my cable stitches so that I have enough "reach over". If you're making a smaller cable, you can use a smaller reach stitch, example "tr" or even a "dc" instead. Sometimes the yarn you choose can also determine this stitch. A finer yarn may reach better than a course yarn.
Row 5: Ch 3 (counts as 1 dc), turn; bpdc over next st, dc in each of the next 3 dc, **you may have to pull your work so that you can see the stitches easier** bpdc over each of the next 3sts, dc in next dc, bpdc over each of the next 3sts, dc in each of the next 3dc, bpdc over next dc, dc in last st.

Row 6: Ch 3 (counts as 1 dc), turn; fpdc over next st, dc in each of the next 3 dc, fpdc over each of the next 3sts, dc in next dc, fpdc over each of the next 3sts, dc in each of the next 3dc, fpdc over next dc, dc in last st.

Row 7: Ch 3 (counts as 1 dc), turn; bpdc over next st, dc in each of the next 3 dc, bpdc over each of the next 3sts, dc in next dc, bpdc over each of the next 3sts, dc in each of the next 3dc, bpdc over next dc, dc in last st.

There, that's the cable stitch! Now repeat Rows 4 to 7, to make your cuff longer!

Rows 8 to 11 (repeat Rows 4-7)

Rows 12-15 (Repeat Rows 4-7)

Rows 16-19 (Repeat Rows 4-7)

Measure to your own wrist as you go. I have a small wrist, so add another Row 4-7 sequence if you need to! (or depending on the materials you chose, your gauge may be different than mine)
Row 20 LAST ROW (Repeat Row 4) ** I ended on a rep of Row 4 to close the cable.

-Ch 1, fold over to form a cuff, wrong side facing out; you will join row 1 and the last row together.

....through both rows together, sl st in same st as join, sl st through next post sts, sl st through each of the next 3 sts, sl st through each of the next 3 post sts, sc through next dc, sc through each of the next 3 post sts, sc through each next 3sts, sl st through next post st, sl st through last sts.
;or sew it together:)

Fasten off and weave in ends. Turn cuff right side out!

Happy Cables!
**Custom: For your starting chain; there is a 1 dc on each side of the swatch. (=2sts), a fpdc on each side (=2sts), decide how many stitches you want on each side of the cable (example; 2, =4sts), decide how many stitches (wide) you want your cable (example 2; =4 stitches), decide if you want to use the dc stitch which separates the cables (you can omit it, if desired)(example=omitted). Add your stitches up, this example =12 sts. Add your turning ch3. = 15chains.


Comments
Post a Comment